
Can Automate interact with databases?
Yes.
Can Automate interact/manipulate files?
Yes.
With these two questions answered, the inevitable question is next: If Automate can do both of these things, can it also load the content of files into SQL?
This question comes up quite often during our consultation calls, so let’s skip the phone call and discuss how you can use Automate to easily and rapidly load information from a Comma Separated Value (CSV) file into a SQL Server Database.
Before actually diving into Automate, we need to set up the file and the database. In my C: Directory, I’ve created a text file called BulkSample.txt. This file can be placed anywhere as long as you remember its path.
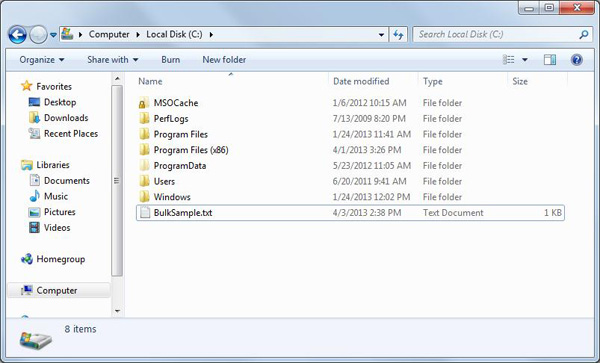
Next, open the text file and enter in the following information:
|
Brian,Wilson |
A04293 |
|
Christopher,Walkins |
C39021 |
|
Brad,Ryans |
R32911 |
|
Stephanie,Sanders |
X30411 |
|
Jessica,Lorenzo |
E30327 |
|
Sandra,Chan |
S39391 |
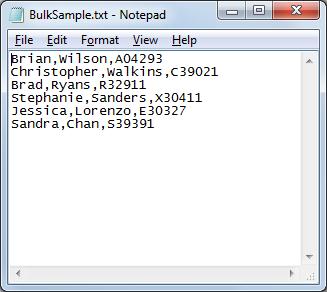
When you’re finished, it should look something like the figure below. A comma is used to separate the FirstName/LastName/Identification Number. A carriage return (Environment.NewLine, or VbCrLf for you nerdy types) is used to delimit each of the entries. Hence “Brian,Wilson,A04293” is one entry and then “Christopher,Walkins,C39021” is another. Once you have this information entered, save and close the text file.
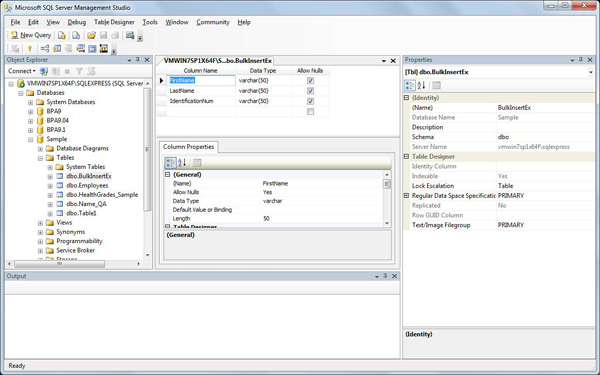
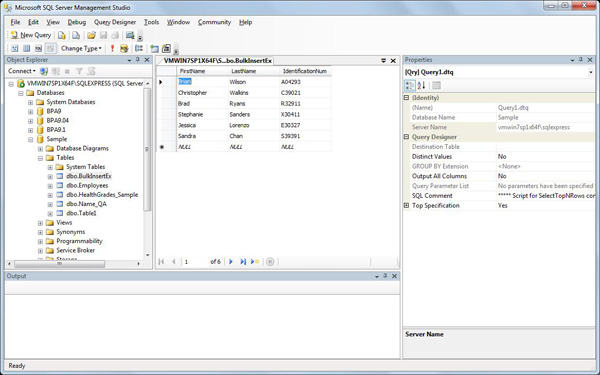
Next we need to set up the database table where the information will be loaded. For this example, I’ll create a Database Table in SQL Server 2008R2 called BulkInsertEx. This table will have three columns: FirstName, LastName, and IdentificationNum. For the DataType, choose varchar(50) because the entries can’t exceed 50 characters.
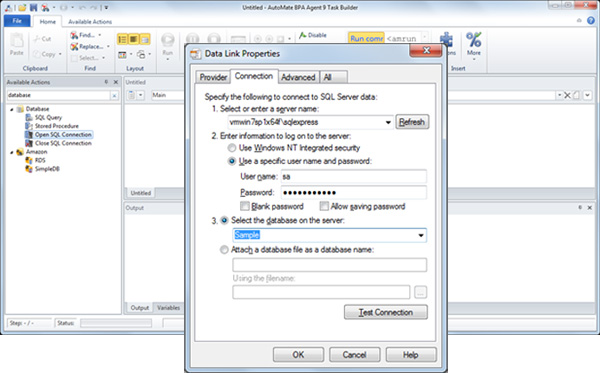
So now that everything has been set up with the file and the database, it is finally time to jump into Automate, specifically using the Database Actions. First start with the Open SQL Connection to your database and fill in the information for the connection.
Next we’re going to run a SQL query by dragging over the SQL Query Action. Select Session Based for the Connection String Type and enter in a name (DS_Query in this case) for the Create/Populate Dataset value.
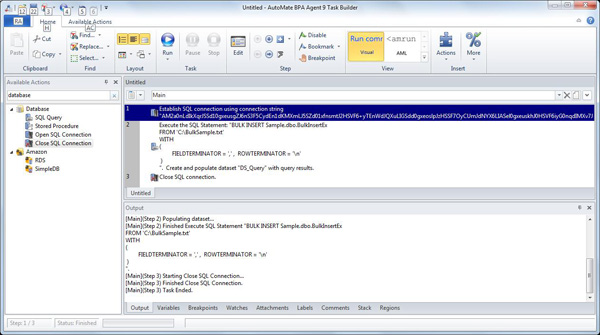
Now you need to enter in the following Query:
BULK INSERT Sample.dbo.BulkInsertEx
FROM 'C:\BulkSample.txt'
WITH
(
FIELDTERMINATOR = ',' , ROWTERMINATOR = '\n'
)
C:\BulkSample.txt: Specifies the file to be loaded
Sample.dbo.BulkInsertEx: Specifies the destination table
FIELDTERMINATOR value: Tells SQL that the values are separated by a comma
ROWTERMINATOR value: Tells SQL that a new line separates each entry. This means that if you had a file that was separated by pipes or some other character, you can easily make a change to the statement.
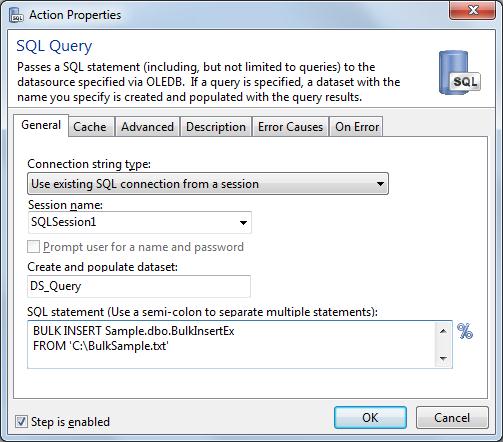
Finally you just need to close the session.
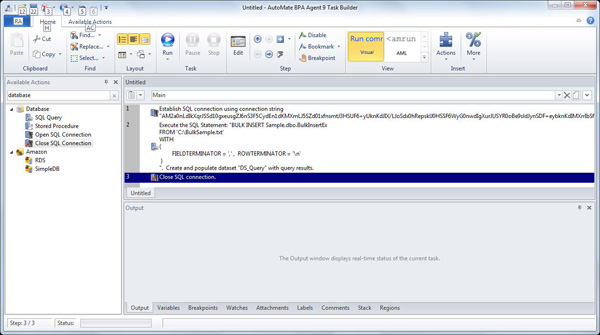
If you go ahead and run the task you should see something like this:
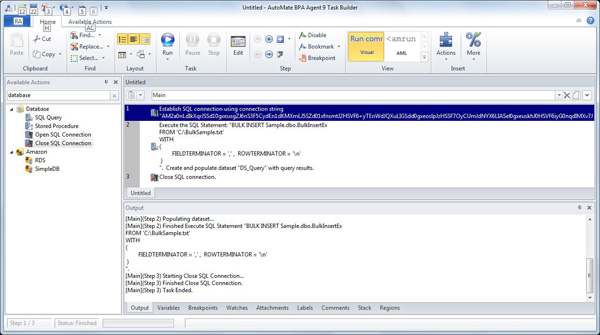
Now, head over to your database to verify that the data was actually loaded.
A couple of things to note:
- The Sample.dbo.BulkInsertEx is the name of my table. If you named your table something different, then you will need to make the appropriate change here.
- The ‘C:\BulkSample.txt’ document is where I saved my CSV file. If you saved yours in a different location, you will need to make a change there. Don’t forget about the single tick marks at the beginning and end.
- The data that you load needs to match the same format as described in the design of the Database Table. For example, if you have a string, make sure the location it is being loaded into has appropriate DataType. If the DataTypes mismatch, you’re going to have some problems.